Hoody

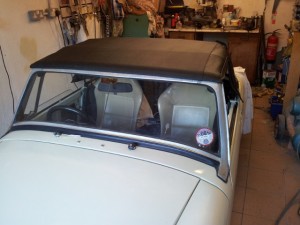
The main achievement this week has been fitting the new hood. The vinyl of the original hood was still in good condition but the windows were torn so a new hood was ordered from donhood.com.  It was with trepidation that I started fitting it but marking the centre line on the car at the rear and on the hood gave me confidence that it would at least be central.  I used the fitting instructions downloaded from the MGOC because they were more concise .

The header rail was pop riveted in place as per the original mainly because the holes were a bit too large for screws. Hopefully I’ll have no need to remove the hood from the rail.

hood-rear

hood-front


The hood came with 6 Tenax fasteners but I’ll use 2 more to replace the velcro strips used on some Midgets and these are still to be fitted.

Since the above photo was taken the passenger door handle and lock are installed and the inner window strip was also fitted.

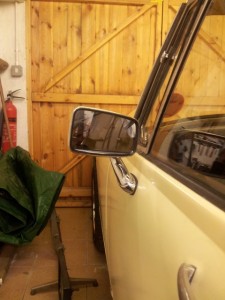
It is now the 22nd and I’ve just realised that I didn’t publish this post so here is a bit more… The to-do list is getting shorter following a few evenings working on the doors. The door mirrors were fitted using the Midget specific mounts for the Tex mirrors.  I did remember to wind the window up before drilling through the door…

behind-you

To save time the existing navy blue door cards were re-used and I’ll sort something out when I’m on the road. It could be new door cards in black or I could try spraying the navy ones, we’ll see. I’m sure the MOT man won’t care too much that the cards don’t match the rest of the interior.

door-cards

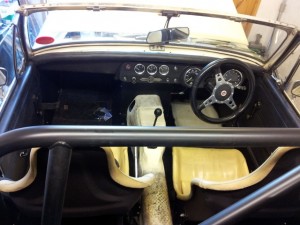
Next up will be finishing the tunnel area. I’m hoping to be MOT ready in two weeks.

Mind the gap

Slowly getting there (I say that to keep me going) but all the finishing bits take more time than expected. Finally finished making the interior panels for the main tub of the car and just the door cards to make at some point. All the carpet is now cut to shape and glued in place and the contact adhesive makes the Midget now smell like a TVR.

Fitted the doors and for some reason the passenger door didn’t seem to fit properly in the gap any more.  A few minutes with my favourite hammer and the gap was opened up but now I need to repaint that section of the car.

door-gap

At the weekend the paintwork was redone using a cheap £10 touch up spray gun and the quality of finish was far better than the rest of the panel so I may have to revisit this at a later date.

And finally tonight I’ve fitted the seatbelts and the newer Elise  seats that I picked up locally at the weekend. Fitting the seatbelts involved removing the roll over bar due to the latter blocking access to the seatbelt mounts on the wheel arch . It really is starting to look like a complete car.

elise-seats-midget-1

The week – part 2

Day 3 of the week’s push for completion and it feels like little progress today.  Little progress however means that the indicator bulb holders have been repaired, cleaned up and fitted. All the wiring to the front of the car is now complete and secured out of the way.  I can’t recall how the bonnet release cable was secured because the original securing bolt was broken off so I made up another cable end. While messing with the bonnet release I ended up shortening the outer casing because I’ve relocated the bonnet release due to the custom heater box being in the way.

The other tasks done included fully fitting the nose assembly and making up a cowl to fill the gap between the nose and the radiator.  The front bumper was retrieved from storage and bashed into a straighter shape with a large hammer.  It isn’t in good condition but I’m not building a concourse car and it does serve the purpose of hiding the poor front end.

rad-cowl


front-bumper-fitted

The rear number plate is now fitted using LED plate bolts but while at the back of the car I noticed a fluid leak. The brake line into a wheel cylinder was leaking quite badly. Quite why this hasn’t leaked before I don’t understand but tightening the connector and testing didn’t show any more leaks so fingers crossed and I’ll be keeping an eye on it.

Days 4,5 & 6 were also spent decorating so not as much Midget fettling time.  The front bumper was fully fitted but not without doing things the hard way. It didn’t come fitted so I acquired some mounting brackets and it needed 2 x 1/2″ UNF nuts. As usual I didn’t have any but I found a 1/2″ UNF tap so some 7/16″ nuts were opened up on the lathe then tapped and hey presto I had a pair of nuts.

Next up was the USB charger point that we now seem to rely on. A £3 dual cigarette & dual USB unit was wired into a permanently live supply with a separate under dash fuse. It then dawned on me that as it steps 12v down to 5v that it would draw a current all the time so the fuse is pulled for the moment and a switch will be fitted somewhere. Fortunately there is a LED indicating when it has power so I shouldn’t leave it draining the battery…

usb-charger

Attention then turned to the interior and finishing making the panels and carpeting the lower sections. More on this later.