Category Archives: MG Midget

Interior update.

There have been no updates because basically I’ve done very little to the Midget that is note worthy. So in one post I’ll cover the whole of 2018 starting with the interior.

Many years ago I found an abandoned black leather sofa near my home so I decided to salvage it for materials.  After years of sitting in a bag I finally had a use for some of the leather.   I give you a set of quilted transmission covers.

Transmission tunnel covers made from a recycled leather sofa.

Attention has now turned to the seats and this is very much a work in progress item. The Caterham seats I fitted a couple of years ago are showing their age and are sagging. They now offer little support and look awful so I’ve started to revitalise one. The tube foam on the frame as been replaced and additional foam sheet added. The first unfinished attempt is below.

Work in progress cover for a Caterham seat.


More tweaks

I’ve been rather slack regards updates so here’s the last 8 months in one post.

The front dampers have been replaced with MGB units fitted to some Mamba Motorsport adapters.  The only real issue was that one damper ended up with some air in it and offered zero damping. Once this was cleared they worked fine.  The only slight reservation is that there isn’t as much droop before the shock bottoms out.     

adapter-platemgb-shock-fitted

One problem with the Midget is that it isn’t designed for people near on 6’2″ in height. This means that seat selection is crucial in order to fit comfortably. Therefore when I had the chance of a pair of Caterham seats I grabbed them.  They fitted nicely and it really feels like I’m sitting on the floor – they’re that low. They also are quite comfortable and even Mrs S likes them.

caterham-seats

The final obvious tweak has been the new grille that was picked up for £20. It looks much smarter than the original black grille but part of me still quite likes the original grille.

new-grille

Still here

Things have been quiet on the Midget front due primarily to the other project at the coast but there have been a couple of tweaks lately.

The cams have been swapped over so the 264 is now on the inlet and the 256 is on the exhaust. The butt dyno felt that it was better that way but the interweb suggested otherwise. Also recently acquired were a pair of HKS vernier cam pulleys which looked great until I came to fit them. I can only assume that they were not for the 16V engine because the locating pin hole was larger and they didn’t align with the pulley alignment mark on the backing plate.

Ten minutes on the pillar drill and the pulleys had new location holes drilled in the correct location. Not sure I like purple but they’ll be out of sight for most of the time.

cam-verniers

The other minor tweak has been the fitting of a shift light on the dash. As I’m running a Megasquirt ECU it needed an output transistor stage added and fortunately I had the foresight to add the wiring in the loom for the 3 additional output wires when creating the loom. Once wired up I was able to set it to trigger at 3000rpm to prove operation and now it is set it to activate at 7000rpm. That should allow me enough time to shift up before the 7300rpm rev limit.

Half Shafts

Having been on the road for a year it meant I was due for another MOT.  Nothing much to report other than failing on headlight aim on the O/S light. This was due to the front springs being uprated to 340lbs and I did lower the aim back then but obviously not enough. Anyway, that is sorted for the next year.

This deas mean I’ve been running for a year with the standard EN17 half shafts and the interweb suggests that they twist and break just by looking at them. On the other hand there are people with them in their K Midgets and they’ve never had an issue. I decided to take no chances and a pair of EN40B shafts recently arrived from Magic Midget.

magic-midget-drive-shafts

After a couple of days admiring them in the living room I was told by SWMBO to remove them from the house so yesterday they were fitted and it only took 35 mins, which was nice.

half-shaft-fitted

This now means I need to add more power….

Assistance needed

With the GreenStuff pads fitted the braking has been what I’d expect from a non assisted setup and is similar to that of the Westfields I’d owned previously. A good firm push will really slow the car down and it is possible to lock the brakes. However jumping from a fully assisted Volvo or Porsche into the Midget does highlight the difference in pedal effort. Therefore it was time  to fit a brake servo primarily to boost the initial braking action.  Having sought  advice from the K Midget Facebook group I ordered a Powertune 1.6:1 unit from MGBHive and waited for it to arrive.

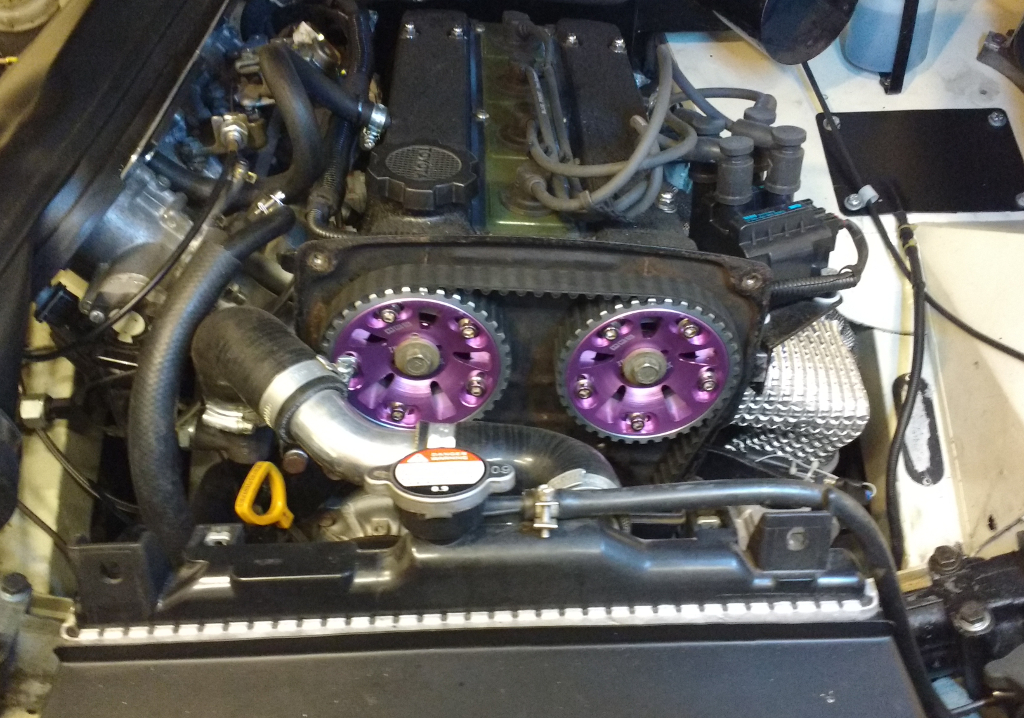
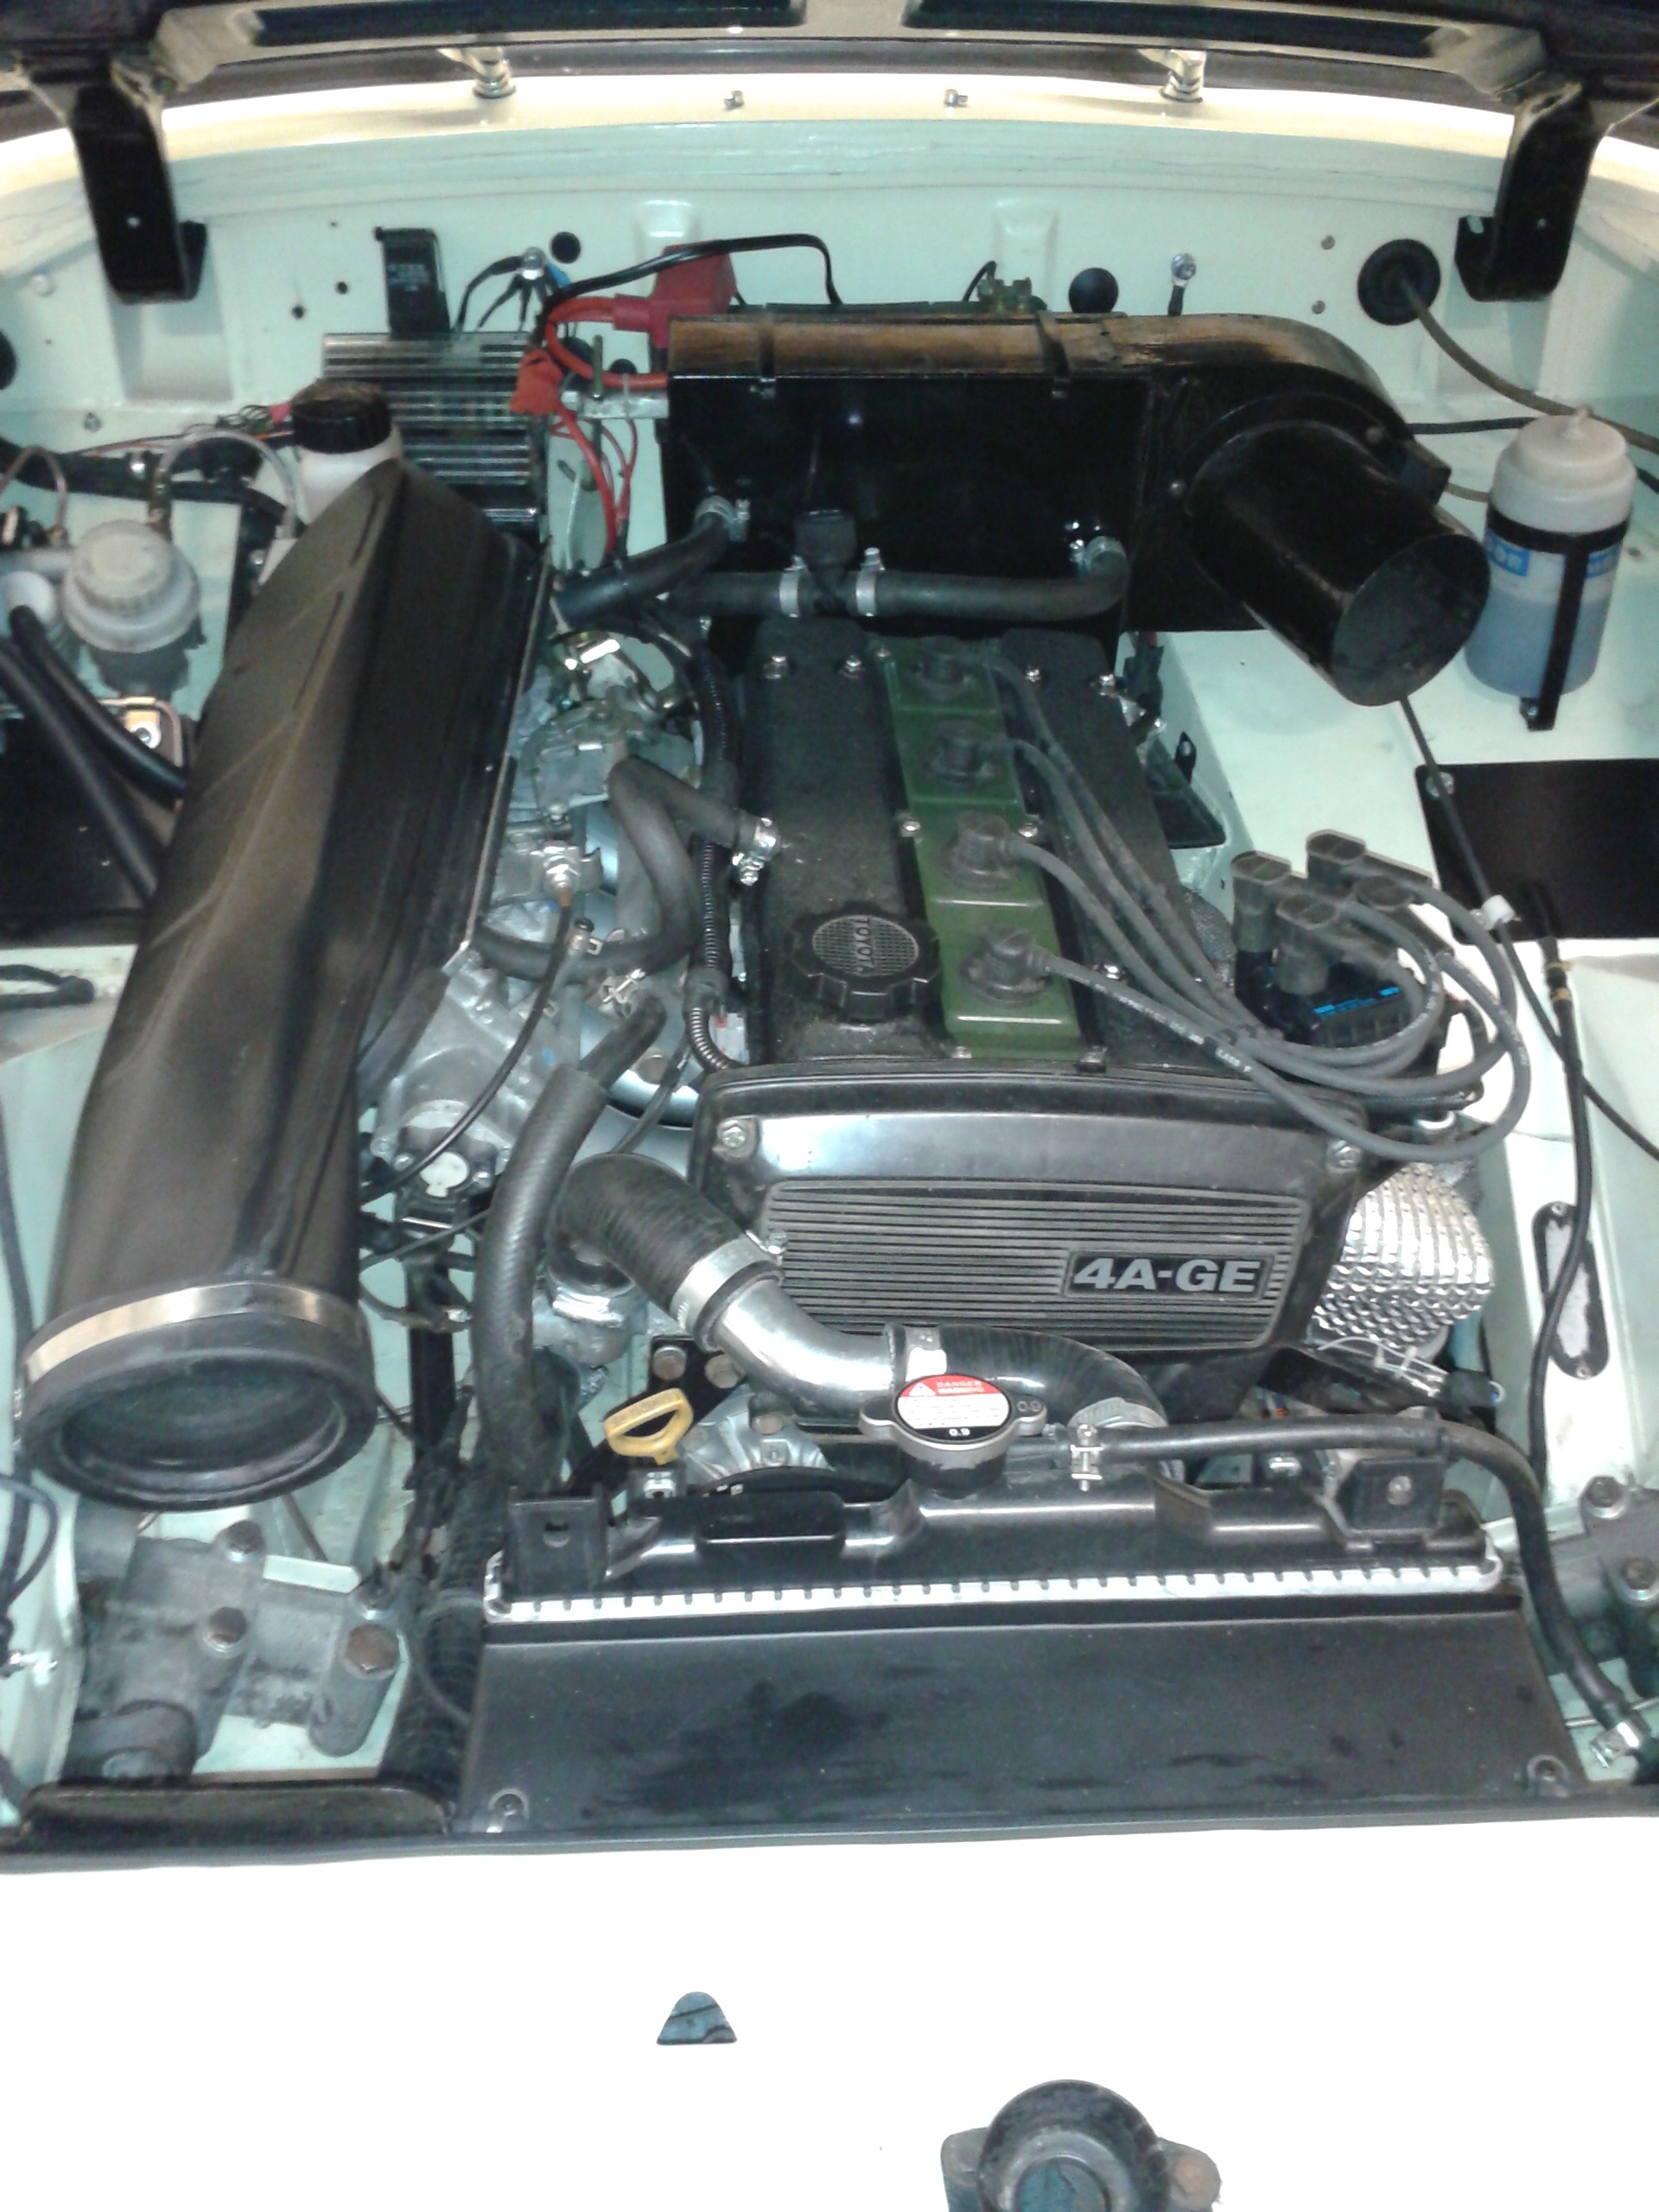
In the meantime I had a set of 256 & 264 HKS cams arrive for the 4A-GE and today the camshaft oil seals arrived so out into the man cave I went. The camshafts were fitted in about an hour (the 256 went on the inlet and the 264 on the exhaust)  and then the courier arrived with the servo which was hastily un-boxed….

servo-1

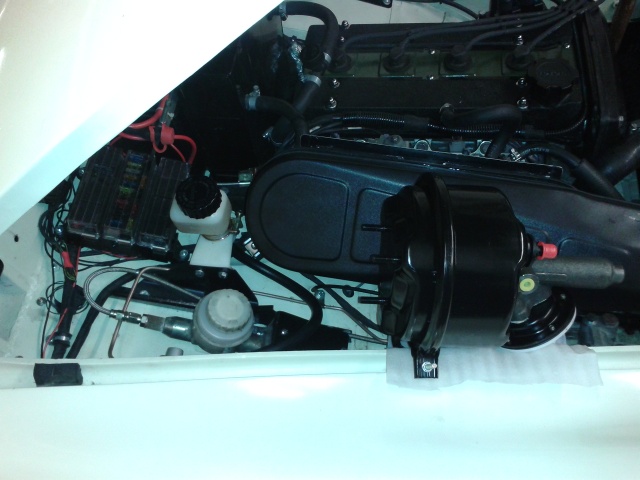
Fook it is big!! I was hoping it would fit in the gap between the brake master cylinder and the wheel arch but being 7.5″ diameter there was no way it was going in. It was now looking like either an expensive paper weight or else it was a long job ahead

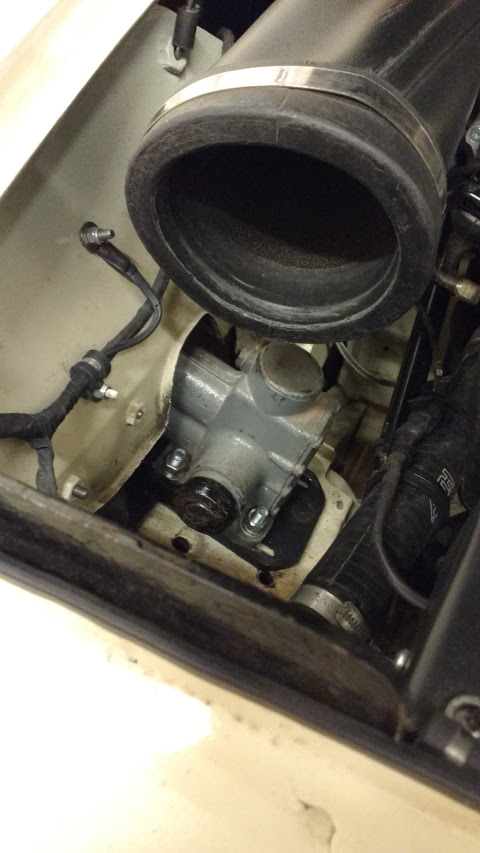
A cuppa and an early lunch later and it was time to man up and pull the offside wing off the Midget. Fortunately one of the K Midget boys had posted a pic of the servo mounted under the wing so I knew it was doable.

servo-fitted

Here’s the servo fitted and plumbed in before refitting the wing and below is the finished job with next to nothing visible although the camera didn’t pick up the wing edge.

servo-hidden

Due to the rain a brief test was carried out on the gravel drive and I can confirm that the brakes do work although they probably need another bleeding.


Rolling Road

The local Pistonheads crowd had organised a rolling road session at Clive Atthowe’s place in Norwich so it was an ideal opportunity to see how the Midget performed with the Megasquirt fitted.

The result was a rather surprising 124bhp at 6700rpm and the power was still climbing. The AFR was rather lean running between 15 and 16 so it wasn’t taken to the 7200 limit.

midget-rr

I’m still rather chuffed that it produced more than the stock 122bhp and yet there is still more to come.

New seats

There’s been no mileage in the last 2 weeks in the 4AGE Midget but there has been another little tweak. The heavy Lotus Elise seats have been removed and replaced with lighter Intatrim Ranger seats. Mind you, most of the 5Kg a pair weight saving came from the frames to mount the Elise seats to the runners. With the Rangers they just needed simple pieces of flat bar between the runners to mount onto.  Currently they’re mounted with the base parallel to the floor but I might raise the fronts slightly to improve the seating.

They’re yet to be proven on the road (snow is stopping play today) but they do look an improvement over the Elise seats. There is even space down the sides of the seats for some pockets to put junk in.

Intatrim Ranger seats in the 4AGE Midget


Spring time

The winter weather has kept the Midget in the shed for a while so I thought I’d look at fitting the (allegedly) Frontline front suspension units. Initially the fixing bolts didn’t align but after a week of re-drilling holes, fabricating the lower arm mounts, fitting new 340lb springs and rerouting the brake lines I ended up removing them.  They didn’t offer and negative camber gain and the callipers were so close to the dampers on full lock that it looked close to a MOT failure.

With just the 340lb springs fitted (purchased at the NEC from Rimmer Bros) it was time for a blast and the improvement over the stock worn springs was vast. The whole car felt more stable on the lumpy Norfolk roads but there is one thing that needs changing – the headlights appear to point skywards now that there is less sag at the front.

Withe the weather staying cold it was an opportunity to do an oil change but this was an oil change by removing the sump. I was surprised at the amount of debris that was left in the sump after draining the oil. A few pieces of very long human hair, some paper tissues and various bits of what I assume are hardened carbon deposits in semi circular shapes.  A good clean out, then checking the conrod bolts and it was all bolted back together and new filter and oil fitted.

A quick trip to the garage to fill up the tank revealed a MPG figure that is worse than either of the Porsches – just 19.7MPG from a 1587cc engine.  OK, there have been a lot of cold starts but the fuel map has been leaned out a lot so I was hoping for 30+ despite the enthusiastic driving.

Swift Midget

Having sorted out the rear end I’ve been playing with the DTA ECU mapping lately. I’m still running a bit rich at low throttle openings and this is reflected in the high fuel consumption, although that also isn’t helped by the short trips and heavy acceleration.  The acceleration is one area where it has improved and the rear end upgrades saw the  0-60 times drop from 8.1 to 7.4 seconds. After the last round of fettling with the ECU the 0-60 time is now a brisk 6.5 seconds

0-60in6sec5

I’m not expecting any major improvements now until I splash out on a rolling road session. To clock a 6.5 sec run means I must be pushing out close to the 122bhp that the 4AGE engine used to deliver in the MR2 so any future gains will need more accurate measurement – namely a rolling road.

Panhard rod

Having fitted the anti-tramp bars that made a huge difference to the handling it was time to knock up a Panhard rod. Because of the non standard tank with the extra wide lip surrounding it, plus the non standard over axle exhaust there was no chance of an off the shelf Panhard rod fitting into the small space between them.  Therefore I had to do it my way – the hard way – again.

The main upright from the body that the rod attaches to was angled to fit between the exhaust and fuel tank. Even this still needed another cut and offsetting by 5mm.  Once the upright was in place the side and rear mounting stays could be fabricated to just miss the bits that wouldn’t normally be in the way. The easiest part to make was the bracket mounting on the axle because there was nothing in the way.

Foolishly I didn’t think to take any photos until after I’d dropped it back on the  floor. Instead I have a pic of the black wrinkle finish cam covers that I’ve just fitted. These have had the lettering removed and look fairly subtle but I do wonder if they’ve just a bit too plain.

4age-midget-cam-covers