The 4A-GE Midget gets closer

Having to use up a load of holiday I’ve another week off so can spend some time on the 4AGE Midget.

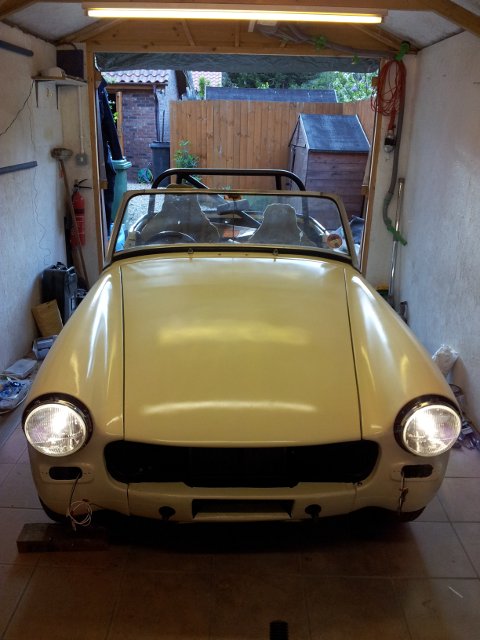
With a spare hour on Saturday I managed to attend to the wings. Being GRP wings I didn’t take them to the gel coat and sure enough a couple of areas reacted to the primer on one wing. A rub down and a spray with a barrier coat paint had them ready for priming.  Monday was a bit cold but I was able to prime and top coat the wings an bonnet and rectify the boot lid.

Fitting the bonnet was easier than I expected but the rear edge was rather low. I was expecting to have to shim out the hinge but after a lot of searching I found a reference to placing blocks of wood under the V of the hinge and then gently forcing the bonnet down. Sure enough that raised the rear of the bonnet to the top of the scuttle.

You can just make out that the rear of the bonnet is below the top of the bulkhead.

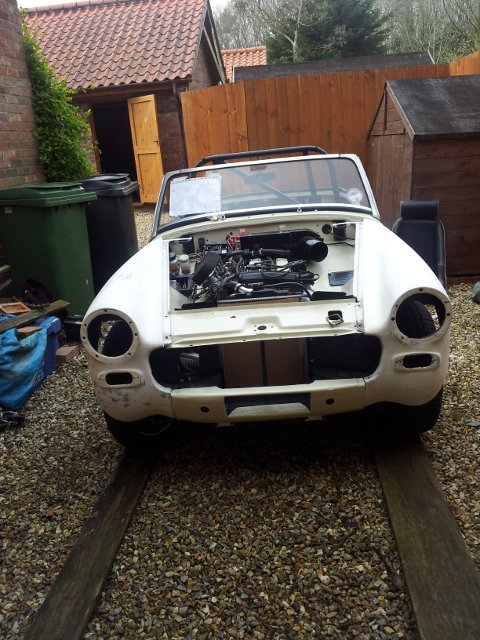
Having had to move the car earlier to make space in the shed, it was frustrating that it wasn’t running as well as it had before. If revved it would die at 3000rpm and just wouldn’t run. I’m rather ashamed to say that the problem was a lack of fuel and as soon as I put a gallon in the tank the fuel gauge moved from empty and it started to behave.

Day 2 of the holiday and I’m winging it today.  The wings are GRP and I recall that they weren’t a brilliant fit when I got the car. Therefore I’m not expecting miracles and will have to accept that I can only do so much with them.  Come lunchtime and I have the offside wing fitted and come mid afternoon both wings are bolted into place and aligned the best that I can. The offside wing is slightly shorter than the bonnet and this is something I spotted on a couple of cars at Silverstone a few years ago.

wings-fitted

After a coffee break it was on to the wiring ( a job I really do like ) and time to fit some new headlights. With the headlights fitted it was time to test that they worked. Battery connected, ignition on and we have dipped beam but no full beam. The full beam relay didn’t even click so that was swapped with the known working dipped beam one but still no joy.  For some reason I went straight to removing the fuse & relay box and the cause was obvious, some muppet hadn’t fitted the relay signal earth lead. Ten minutes and one lead later and we have working main beams.

bright-eyes

Just as I was turning the car round on the gravel drive my dear wife  arrived home to witness some hooligan behaviour 🙂

Time for an Old Crafty Hen to celebrate…

Seating

The other week I managed to get the wings and bonnet in primer but found some residual paint that reacted with the primer. They’ll need rubbing down in a few spots and a barrier coat applied before they’re due for the topcoat next week.

In the meantime attention has turned to the seating and this is where the fun starts. Being 6’2″ I need to sit as low as possible to keep my head below the top of the screen and below the roll bar. Space for long arms is another requirement so a seat that is tilted as far back as possible will help however the presence of the roll bar is preventing this with the majority of seats.

As I have a pair of Elise bare shells they’ll be initially fitted until I find the perfect seat. The seat runners are from an old pair of TVR seats that were in the shed and fitted with just a new rear mounting hole drilled through the runner base.  The frame to take the Elise seats was fabricated from some 3mm x 75mm steel and bolted to the top of the runners.

This is the drivers seat showing how it has been angled to clear the side of the car and it points towards the pedals rather than being offset to the left.  Having a Porsche 964 where the pedals are offset to the left I’m used to offset pedals but here I’m lined up nicely with them but have an offset sheeting wheel.  It is called character.

Elise seat offset to the left
drivers-seat-a
View showing drivers seat in relation to the roll bar.


Rolling on

I’m starting to feel like I’m on a roll and that the 4AGE Midget is making real progress although as usual I’m having to revisit some jobs. The GRP wings have had some attention dealing with cracks and drill holes. The trial fitting however highlighted another problem, how do I top up the brake fluid?

brake-reservoir-cap

The Tilton master cylinder lid wasn’t removable due to the wing being in the way. Fortunately the Tilton was part of a kit and a few hours later the reservoir was remotely mounted.

The other day I picked up a nice set of Minilight style wheels and for the first time in about 3 years the car is off the axle stands.  I was rather shocked at how low it is and foresee a bad back from bending over it if I’m not too careful.

Here’s the first escape from the shed…

on-wheels


The hydraulic clutch wasn’t working and sounded like it was leaking fluid but fortunately I had the old brake master cylinder spare so this was substituted.  I still wasn’t getting the clutch to release so the spacer that was there to move the pedals nearer the bulkhead (this was a suggestion I’d seen somewhere) was removed.  This was a success and now the clutch worked.

Evidence that it could move under its own power….

evidence