It has been just over 2 months since the last update and things are moving forwards. After I’d posted the manifold pictures I made a list of jobs to do before I could fire up the car. Looking back now I realise that I’ve done quite a bit so here’s what has happened.
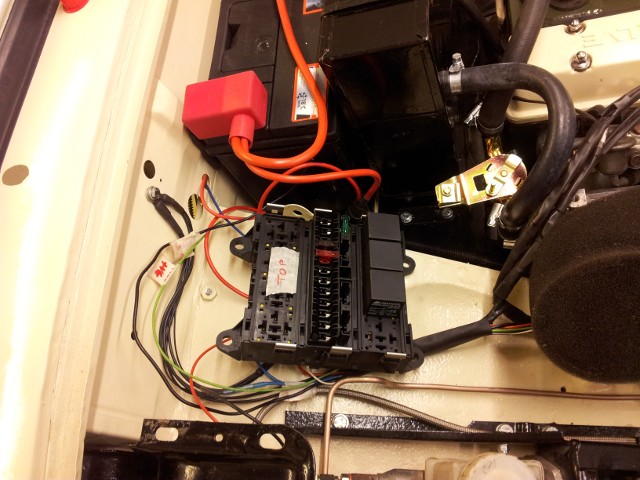
The engine bay wiring was completed and the fuse and relay boxes wired up. Temporary wiring for the fuel pump and ignition switch was installed. The wiring for the alternator and starter was revisited to move it out of the way and protect it from the heat of the manifold.
The fuel lines were all fully secured and all clamps tightened and a sleeve knocked up for the fuel rail for blanking off one of the extra banjo connectors. After a bit of messing around caused by me wiring the ECU to the wrong side of the fuel pump relay, I had a working fuel pump. The engine and gearbox oils were added and with a temporary 2″ straight pipe to the rear it was time to try firing up the engine. A bit of tweaking to the fuel map and ignition was required but after about 15 minutes of tweaking it fired up for 10 seconds. October 23rd 2013 was a major milestone in this project. With no coolant in the system it was left at that short run but at least it worked.
The exhaust system was fabricated from straight 2″ pipe plus an over axle bend. This needed lengthening on each of the up and down sections to match the bodywork and the mounts were made using 3 classic Mini mounts. A couple of mild steel silencer boxes and a few more bends and the system was completed. To give it the new car look it was sprayed with silver BBQ paint. Time will tell if this lasts.

Last week I started the wiring to the rear of the car and today that was all pretty much finished bar a few cable clips that need fitting. All the rear lights work but I might replace the bumper mounted number plate lights with LED number plate bolts instead. The only reason being that it will be easier to seal the bolts that it will the cable to the bumper mounted lights. Cloth tape was used because it looks more authentic and seems to hold together over time better than PVC tape.
The prop shaft arrived from Bailey & Morris today (very impressed with their service) and was eventually fitted. Trying to get the prop into position while working on the car on axle stands and with the axle and fuel tank fitted a challenge.